I’m always looking for unique ideas for displaying candles, so when I saw someone on YouTube turn two small foam pumpkins into candle holders, I wanted to put my own spin on the idea. I already had a variety of foam pumpkins in my stash and chose two that I thought would suit the purpose. Here’s how to make a unique pair of pumpkin candle holders for fall and Thanksgiving with things you probably already have in your stash.
Make a Unique Pair of Pumpkin Candle Holders
I am an Amazon Affiliate. If you click on a link and make a purchase, I will earn a small commission at no extra cost to you.
Supplies used and Recommendations:
- 2 small foam pumpkins
- utility knife or craft knife
- battery-operated taper candles
- gold Rub ‘n Buff
- 2 – 4 inch square wood signs
- acrylic paint (classic caramel)
- thin ribbon
- assorted embellishments
Step 1: Remove Stems from Pumpkins
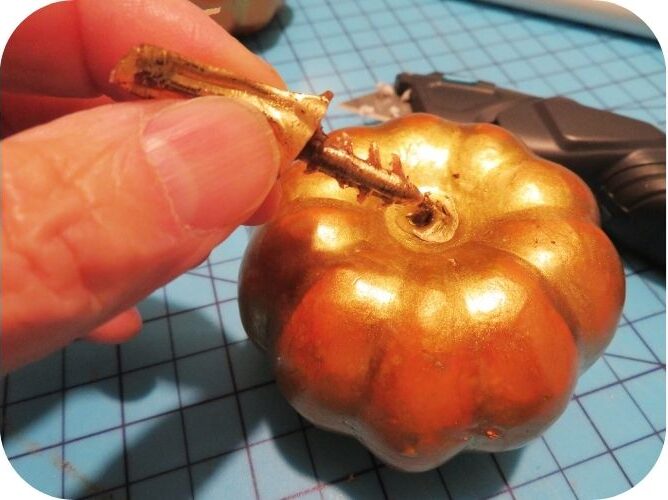
These pumpkins are about 2 1/2 inches wide by 2 inches tall and are solid foam. We won’t be needing the stems, but they can be saved for other projects.
Step 2: Carve Hole in Centre
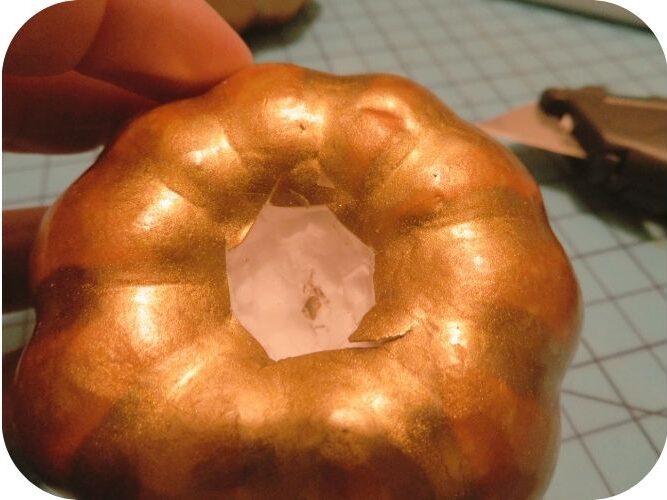
I used my utility knife to cut out the centre of each foam pumpkin to a depth of about 1/4 inch. Cut the hole small to start, then adjust it to fit the base of the candles you’re using.
Step 3: Fit Candles
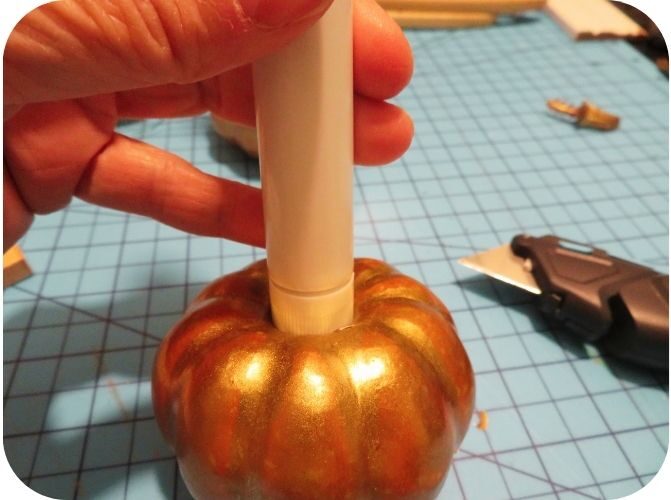
The candle should fit snugly into the hole, so it will stand up straight. Adjust the width and depth, as needed for the candle you are using.
Step 4: Paint with Rub ‘n Buff
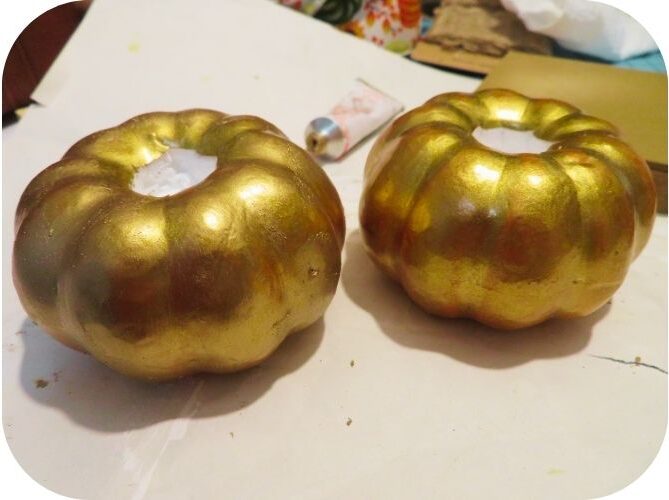
I wanted to tone down the brassy gold colour of the original pumpkins, so I gave them one coat of Antique Gold Rub ‘n Buff. Paint your pumpkins in a colour that suits your decor.
Step 5: Make Bases
To ensure that the pumpkins would stay upright with the candles inserted, they will need bases. I chose these to give my candles a bit of extra height. These two small signs were in my stash, but any flat piece of you have on hand would work as a base, too. These signs are approximately 4 inches square and about 3/4 inch deep.
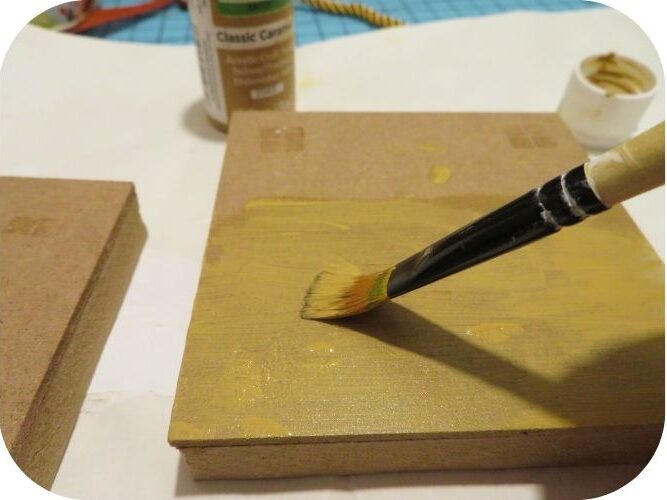
To make them into bases, I turned them upside down and gave each of them two coats of Classic Caramel by Apple Barrel. Choose whatever colour coordinates with the pumpkins you’re using. I only painted the tops of the stands, because…
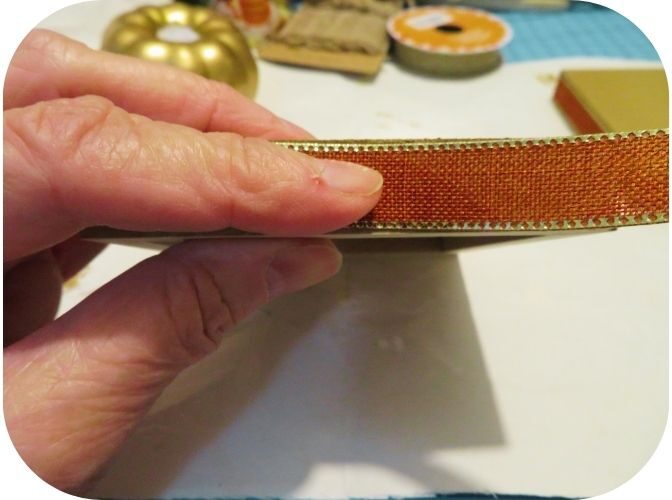
…I wanted to add a ribbon trim around the edges. This rust and gold-trimmed ribbon is from Dollar Tree and is the perfect width to fit around the base.
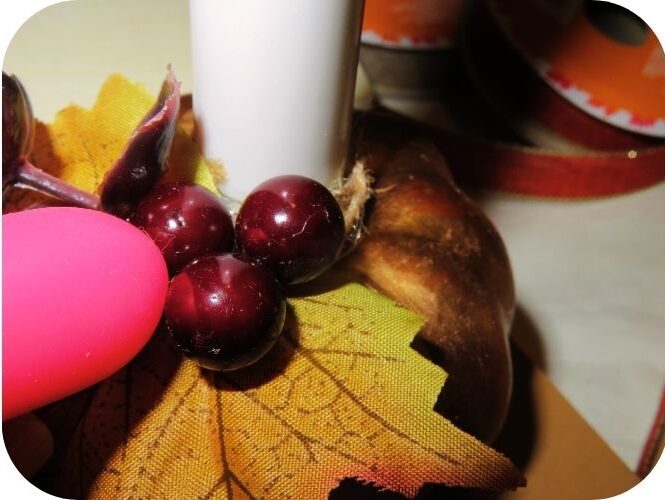
Step 6: Add Embellishments
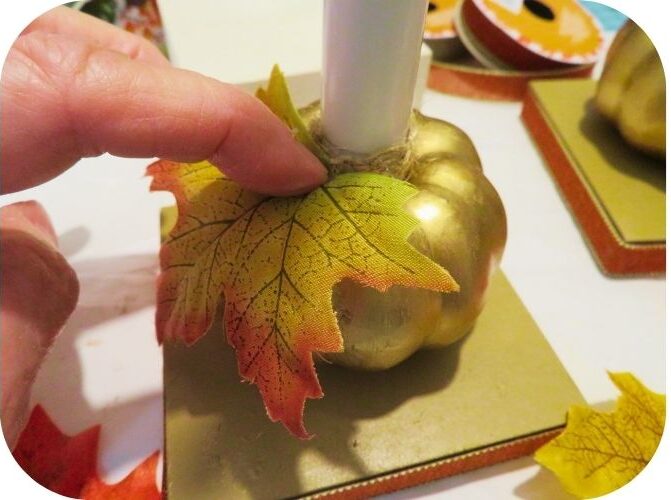
After hot gluing each pumpkin onto the middle of the bases, I chose a leaf, some eucalyptus and a small clusters of berries from the bits and pieces I had in my stash to decorate the candle holders. Add whatever embellishments you like. I made sure to only glue the extra bits to the pumpkin. The battery-operated candles I’m using will need to be easily removed, so I can twist the bases to turn them on and off.
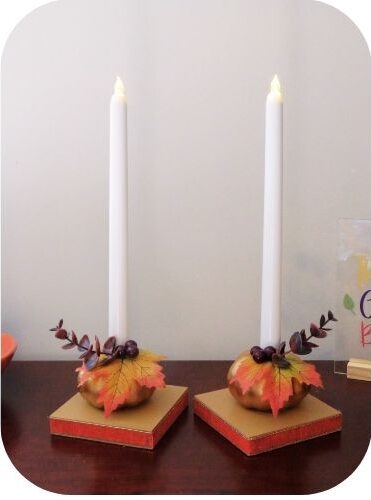
I like the way my new pumpkin candle holders turned out. They were easy to make and add a unique touch to my fall decor. This idea could be tweaked to use with any type of LED candle, such as tea lights or votive candles.
***
If you enjoyed this post, sign up for the Dollar Store Style newsletter. Each month you’ll get a new article, my pick for a Find of the Week, a Quick Tip for decorating, a Product Review and much more.
