It’s no secret that I love miniatures. For as long as I can remember, I’ve been drawn to tiny things. Turns out I’m not alone. According to an article in USA Today, “Consumers are drawn to the collectability, affordability, and stress-relieving aspects of miniatures.”
However, collecting miniatures can be an expensive hobby. So, every spring, I add to my supply of fairy garden houses and accessories by shopping at Dollar Tree. They usually have cute new houses and a variety of accessories such as sign posts, colourful mushrooms and bird baths.
I like to use these pieces to create different decor pieces I can display indoors. Here’s how to use Dollar Tree fairy garden miniatures to create a village on a riser that you can enjoy year-round in your home.
Make a Fairy Garden Village on a Riser
I am an Amazon Affiliate. If you click on a link and make a purchase, I will make a small commission at no extra cost to you.
Supplies Used and Recommendations:
- 3 fairy garden houses
- assorted fairy garden accessories
- 14 x 4 inch wood shelf or board
- square of artificial turf
- cut branch pieces (for riser legs)
- hot glue
- paperboard fencing
- wire leaf garland
Step 1: Cover Shelf with Artificial Turf
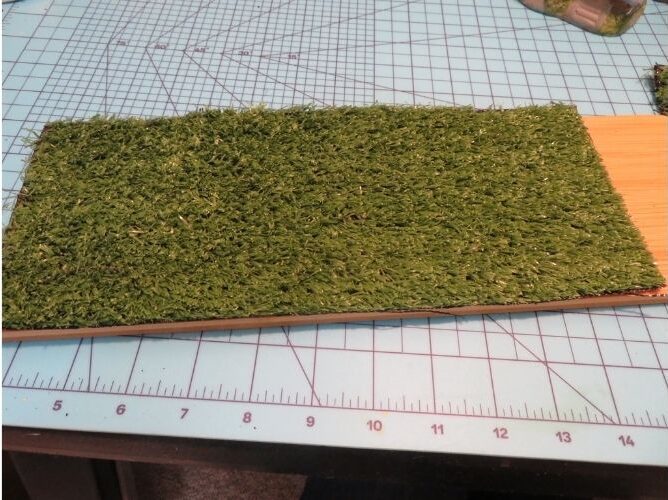
I had this 14 x 4 inch shelf in my stash and started by covering it with some artificial turf. The turf square I had in my stash was 12 inches square. I trimmed it to fit the shelf and patched a piece on one end. Even though the tile was peel and stick, it wasn’t very sticky anymore, so I used hot glue to secure it in place.
Step 2: Add Legs to Make a Riser
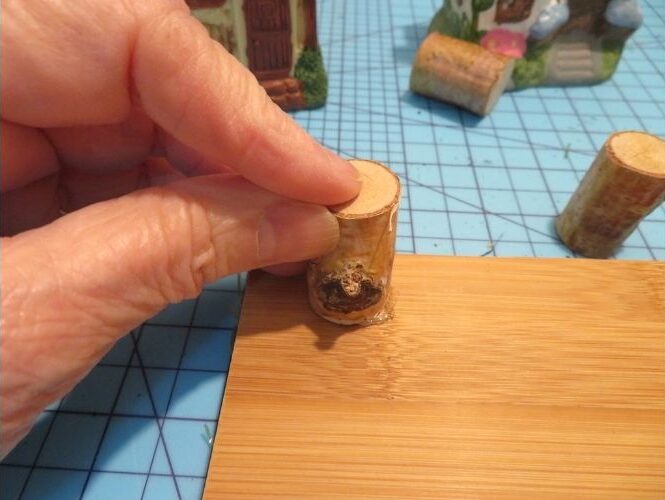
I wanted to turn this shelf into a riser so I pulled out my bag of cut branch pieces from Dollar Tree, found four the same height and glued one to each corner. I thought using the cut twig pieces would add to the outdoorsy look of the display, but it did take some minutes to find four that were level enough and of the same height, so the riser would sit level.
You could cut a found branch into four equal pieces, but if this seems too tedious a process to you, just use whatever you have on hand as legs for your riser. Medium-sized square blocks or large beads would serve just as well for the purpose.
Step 3: Choose Which Fairy Garden Houses to Use
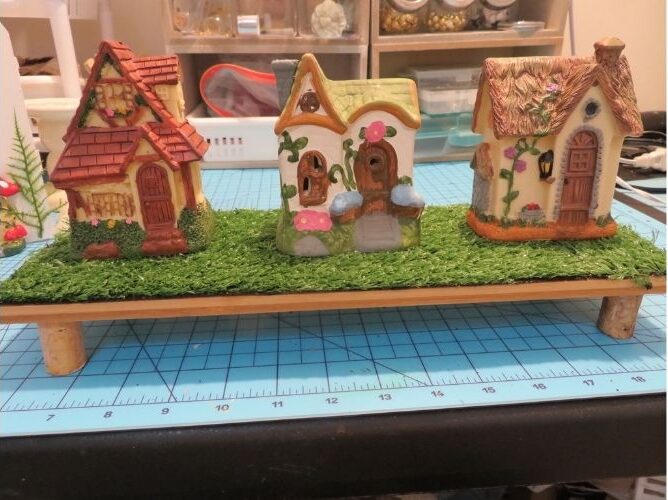
Every year, I add to my fairy garden collection from Dollar Tree’s selection. The two houses on the outside were new this year. The one in the middle is a house I’ve had in my collection for a few years. I just sat them on the riser to see where they would look best, then removed them again, while I worked on the rest of the riser.
Step 4: Paint Fence Pieces for Fairy Garden Village
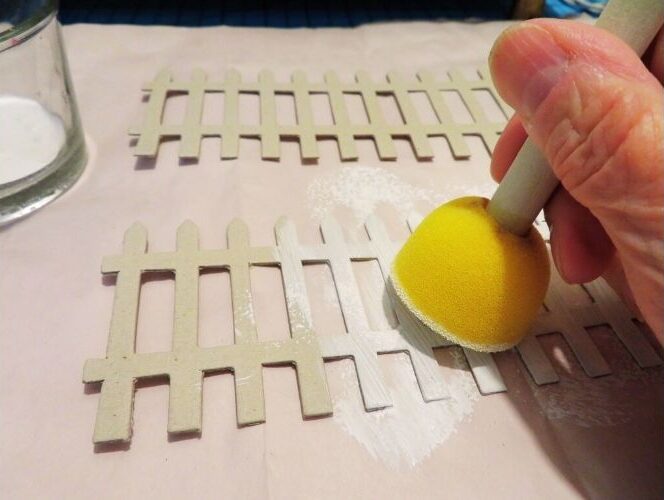
These paperboard picket fence pieces were already in my stash. I believe you can now buy unfinished wood fence pieces at Dollar Tree. Using a paint sponge makes an easy and quick way to paint the fence pieces without leaving brush strokes. I believe I used two coats of white acrylic paint to cover the paperboard.
Step 5: Glue Fence Pieces to Back of Fairy Garden Riser
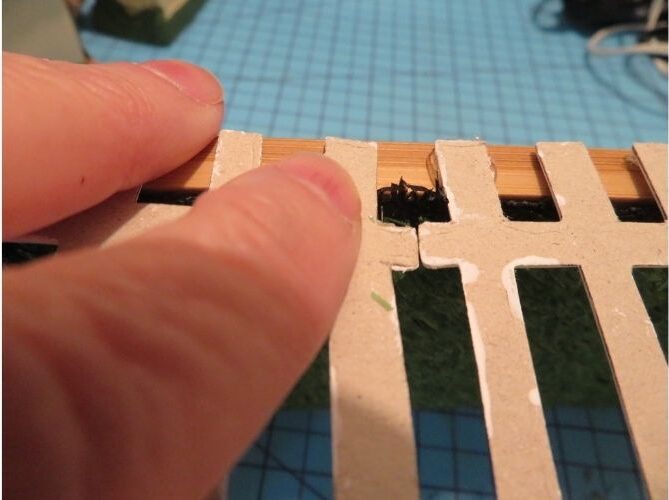
Next, I hot glued the fence pieces to the back of the riser along the edge.
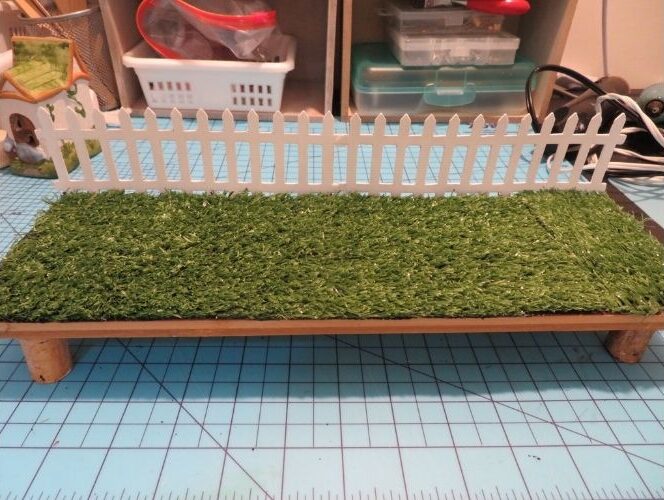
This gives my fairy garden a nice backdrop.
Step 5: Add Greenery to Fairy Village
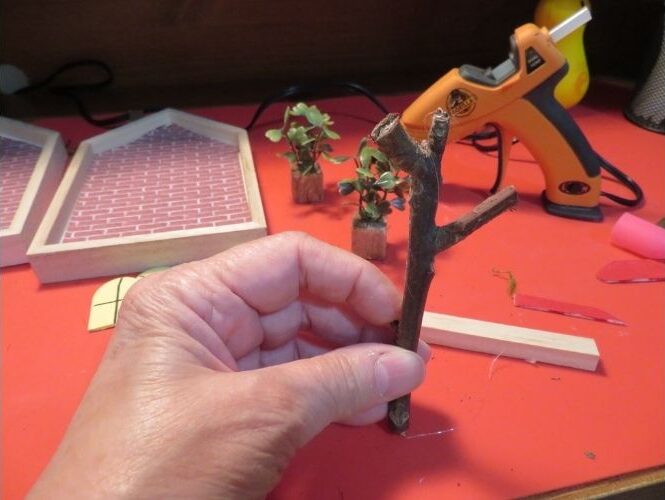
I found a twig in the yard that had a couple of forks in it, to act as the trunk of a tree.
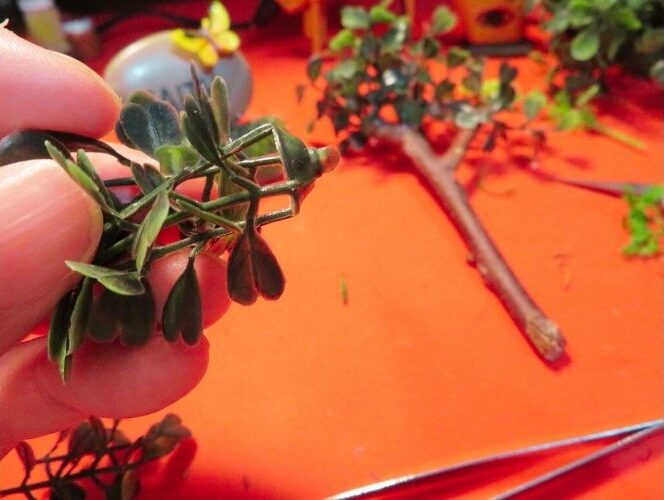
I pulled some pieces off of a faux boxwood ball to glue to the top of the tree…
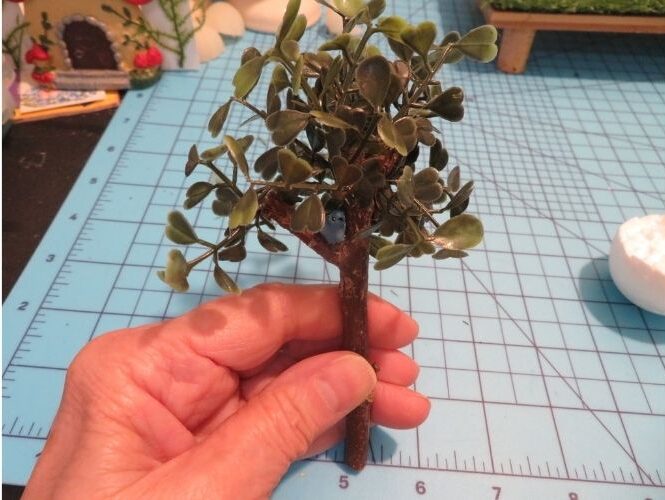
…and just kept adding the leaves until I was satisfied with the fullness. Then I added a tiny bird to one of the branches.
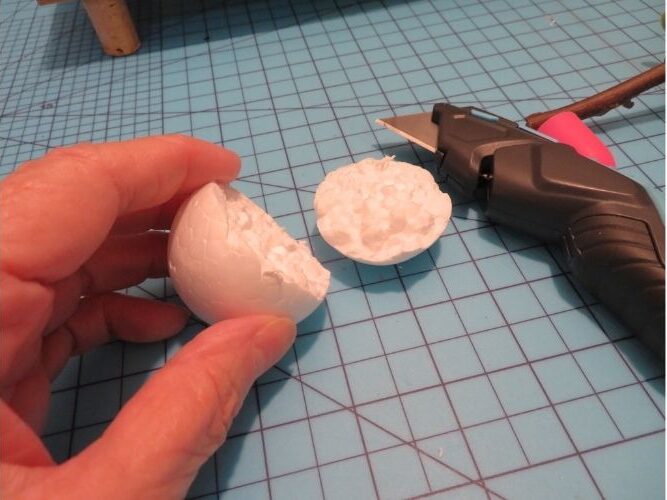
I cut a small styrofoam ball down so that it had a flat surface. This will act as a base for the tree so it can be glued to the riser.
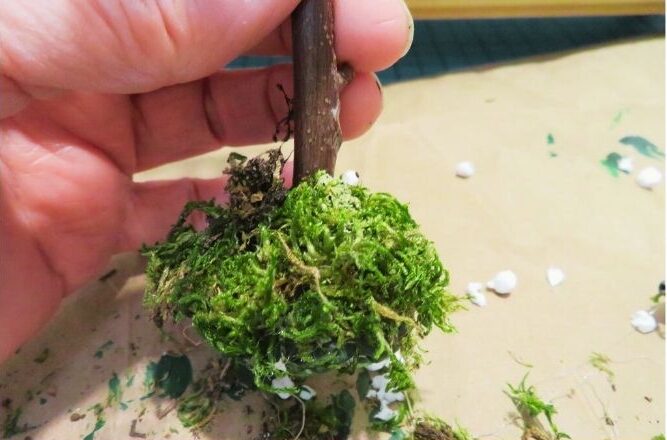
After inserting the tree in the styrofoam, I covered the base in moss to disguise it…
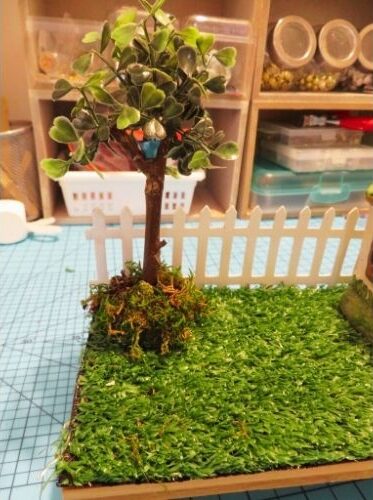
…and hot glued it onto the left-hand side the riser.
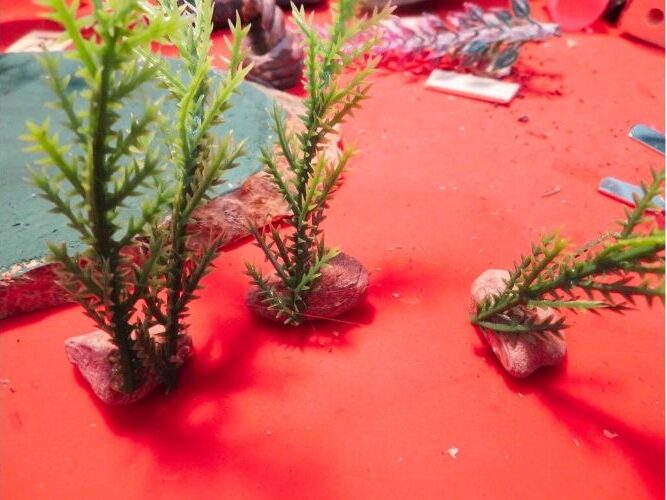
You can easily make a bush for the fairy garden by gluing some tall greenery pieces to small flat-bottomed stones.
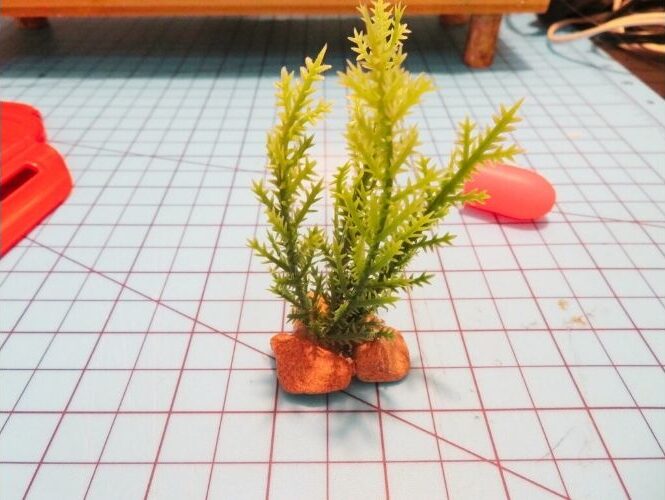
Gluing all of the stones together creates a free-standing bush that you can add to your fairy garden riser wherever you want more greenery.
Step 6: Add Houses and Additional Fairy Garden Pieces to the Riser
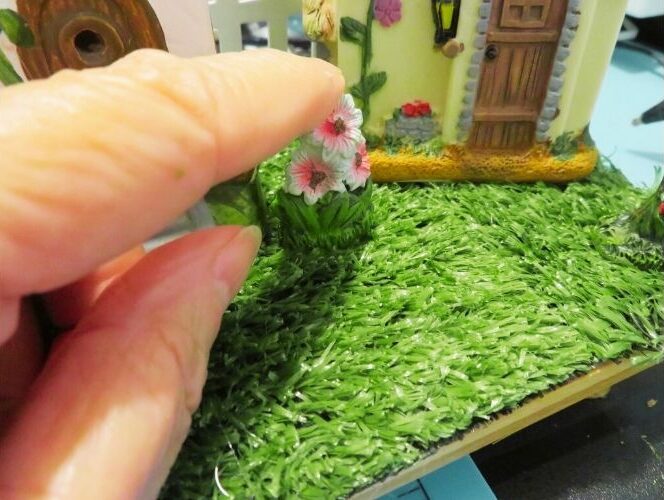
I placed the houses on the riser and hot glued some of the smaller pieces from my Dollar Tree fairy garden miniatures around them.
Step 7: Add Decorative Leaf Garland
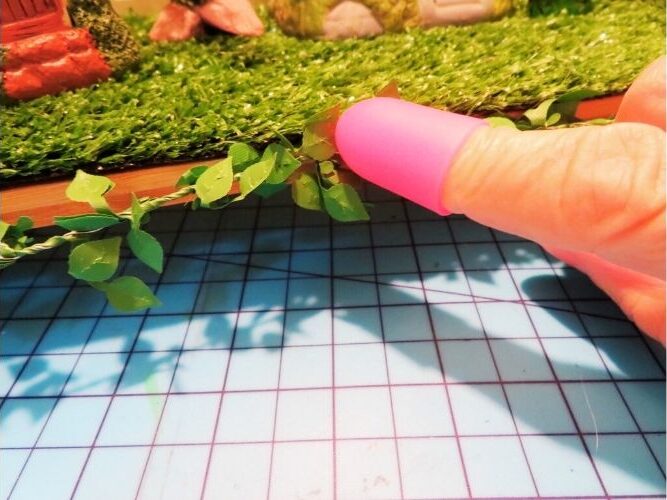
I finished off the riser by hot gluing some leafy wired garland to the front of the shelf.
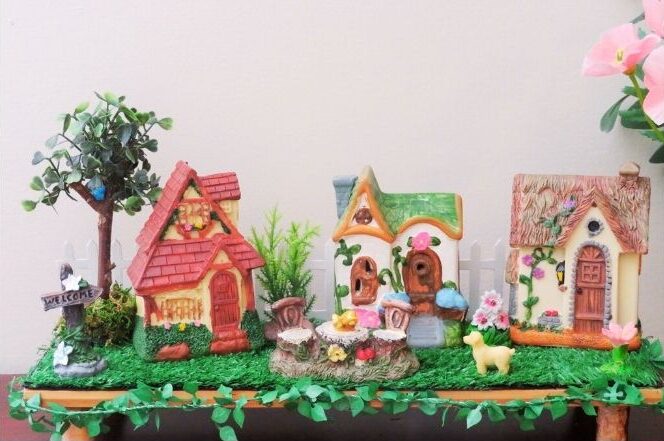
You can add whatever accessories you have on hand to customize your own fairy garden village. I’m very pleased with the way mine turned out.
***
If you enjoyed this post, sign up for the Dollar Store Style newsletter. Each month you’ll get a new article, my pick for a Find of the Week, a Quick Tip for decorating, a Product Review and much more.