As the days get warmer and the crocuses and daffodils push themselves up through the earth, I find myself longing for more colour inside my home. Fortunately, all I needed to do that was a bit of paint and a trip to the dollar store. So, let’s make some bright and cheery summer decor using the wooden flowers you can find in the craft aisle at Dollar Tree.
Bright and Cheery Summer Decor Using Wooden Flowers
I am an Amazon Associate. If you click on a link and make a purchase, I will make a small commission at no extra cost to you.
Supplies Used and Recommendations:
- 3 wooden flowers on dowels (Dollar Tree)
- 7″ ceramic flower pot
- mitre shears
- half beads
- acrylic paints
- floral foam
- moss

I found these large wooden flowers in the craft aisle at Dollar Tree.
Step 1: Paint the Half Beads and Wooden Flowers
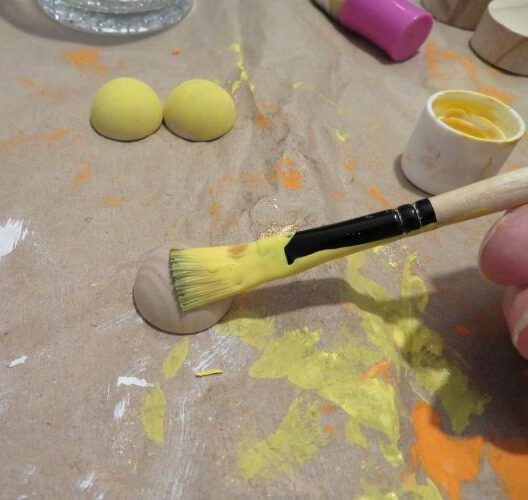
I painted the half beads I’m using for the centres of my flowers yellow. You can sometimes find half beads at the dollar store but they can also be ordered on Amazon for a reasonable price.
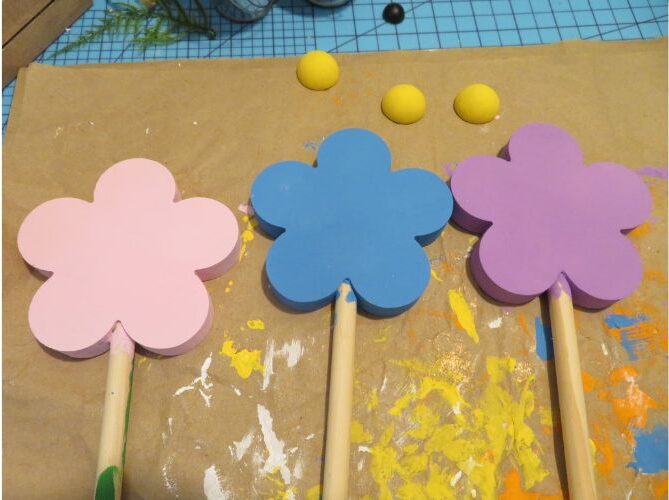
Next, I painted each of the three wood flowers a different bright colour. The pink I had was too overpowering for my liking so I started with white acrylic paint then mixed in some of the pink until I had a shade I liked.
I gave each of the flowers two coats of acrylic paint.
Then I painted the “stems” green. It isn’t necessary to paint the entire stem, as you’ll be cutting some of each one off so they’ll be at different heights.
Step 2: Add Half Beads to the Wooden Flowers

I hot glued the half beads to the centre of each of the three wood flowers.
Step 3: Choose a Pot

I’m using this 7 inch ceramic plant pot that originally came from Dollarama, but you could use one of containers from Dollar Tree. If you choose a plastic pot, you will need to weight it down with rocks to keep your finished project from being top-heavy.
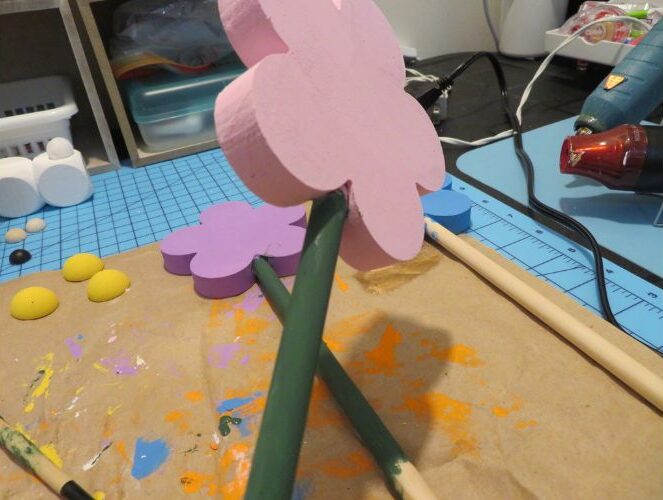
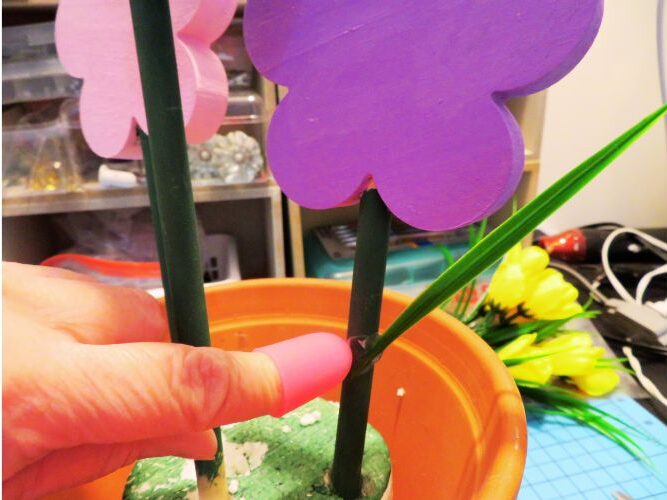
Step 4: Cut Stems to Three Different Heights and Arrange in Pot

I used my mitre shears to trim each flower stem so that they would be three different heights and planted the them into some reclaimed floral foam in the ceramic pot. I had saved the piece of round foam from a floral piece I had bought previously and disassembled. It happened to be weighted in the bottom, but you will need to glue regular floral foam into the pot to keep the heavier wooden flowers from tipping.
Step 5: Add Leaves to Wooden Flowers
I wanted to give each of my flowers a leaf. These long spiky ones looked best to me so I hot glued one of them to the back of each stem.
These leaves were cut off of a faux floral bouquet I already had on hand.
Step 6: Fill Flower Pot With Moss

The next step is to fill in around the floral foam and the flower stems with moss. I used some I already had in my stash. It’s not necessary to glue the moss down.
Step 7: Optional Embellishments
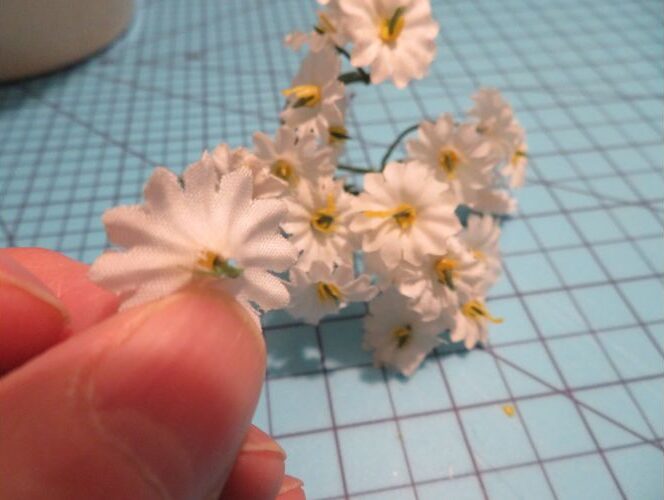
I pulled out some of these tiny white flowers from my stash and cut a few of them off the stem right up close to the flower. Then I placed a few of them over top of the moss around the flowers just for a bit of extra decoration. I didn’t feel the need to glue them down.
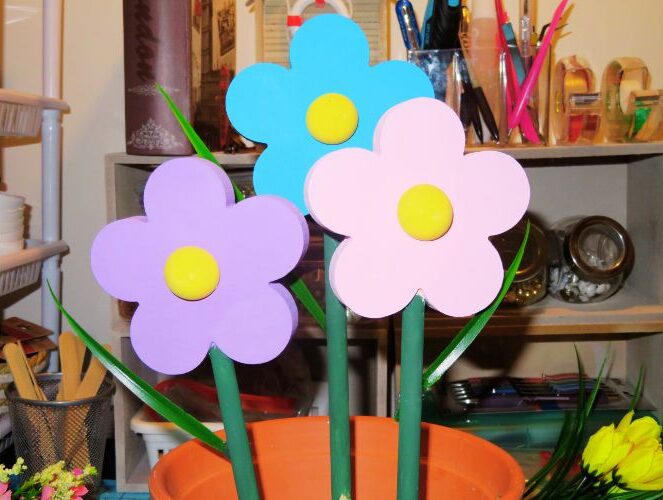
Finished Wood Flower Decor

I was pleasantly surprised by how well this project turned out. It’s a bright and cheery decor piece that I can enjoy for the rest of spring and all through the summer season.
***
If you enjoyed this post, sign up for the Dollar Store Style newsletter. Each month you’ll get a new article, my pick for a Find of the Week, a Quick Tip for decorating, a Product Review and much more.
