Why Paint by Numbers Is the Ultimate Budget Wall Art Hack
by Liam Vance
How Paint by Numbers Kits Create Stunning Wall Art on a Budget
Let’s be honest, decorating your walls can drain your wallet fast. A single framed print from a popular home décor retailer often costs more than you’d expect, and commissioning original artwork? That’s a whole different budget category. Here’s where paint by numbers steps in as the smartest shortcut for anyone who wants beautiful wall art without the hefty price tag. For roughly the cost of a dinner out, you get a complete kit that produces a genuine one-of-a-kind piece hanging in your living room.
The best part? You don’t need a single ounce of artistic talent. Seriously. If you can follow numbers and stay (mostly) inside the lines, you can create something that looks like it belongs in a curated gallery wall. All it takes is patience, a free afternoon or two, and a willingness to surprise yourself.
And before you picture those basic kits from the children’s craft aisle, think again. Today’s paint by numbers offerings have leveled up dramatically. We’re talking about:
- Sophisticated landscapes that rival professional canvas prints
- Abstract and modern designs perfect for contemporary spaces
- Custom photo kits that turn your own images into paintable canvases
- Detailed portraits and cityscapes with real visual depth
The quality of paints, brushes, and pre-printed canvases has improved so much that finished pieces genuinely fool visitors into thinking you picked them up at an art fair.
For budget-conscious decorators, this is the sweet spot where affordability meets personal style. Instead of scrolling endlessly through mass-produced prints that half your neighborhood already owns, you end up with something that carries your own effort and energy. That personal touch is what transforms a room from “decorated” to truly yours.
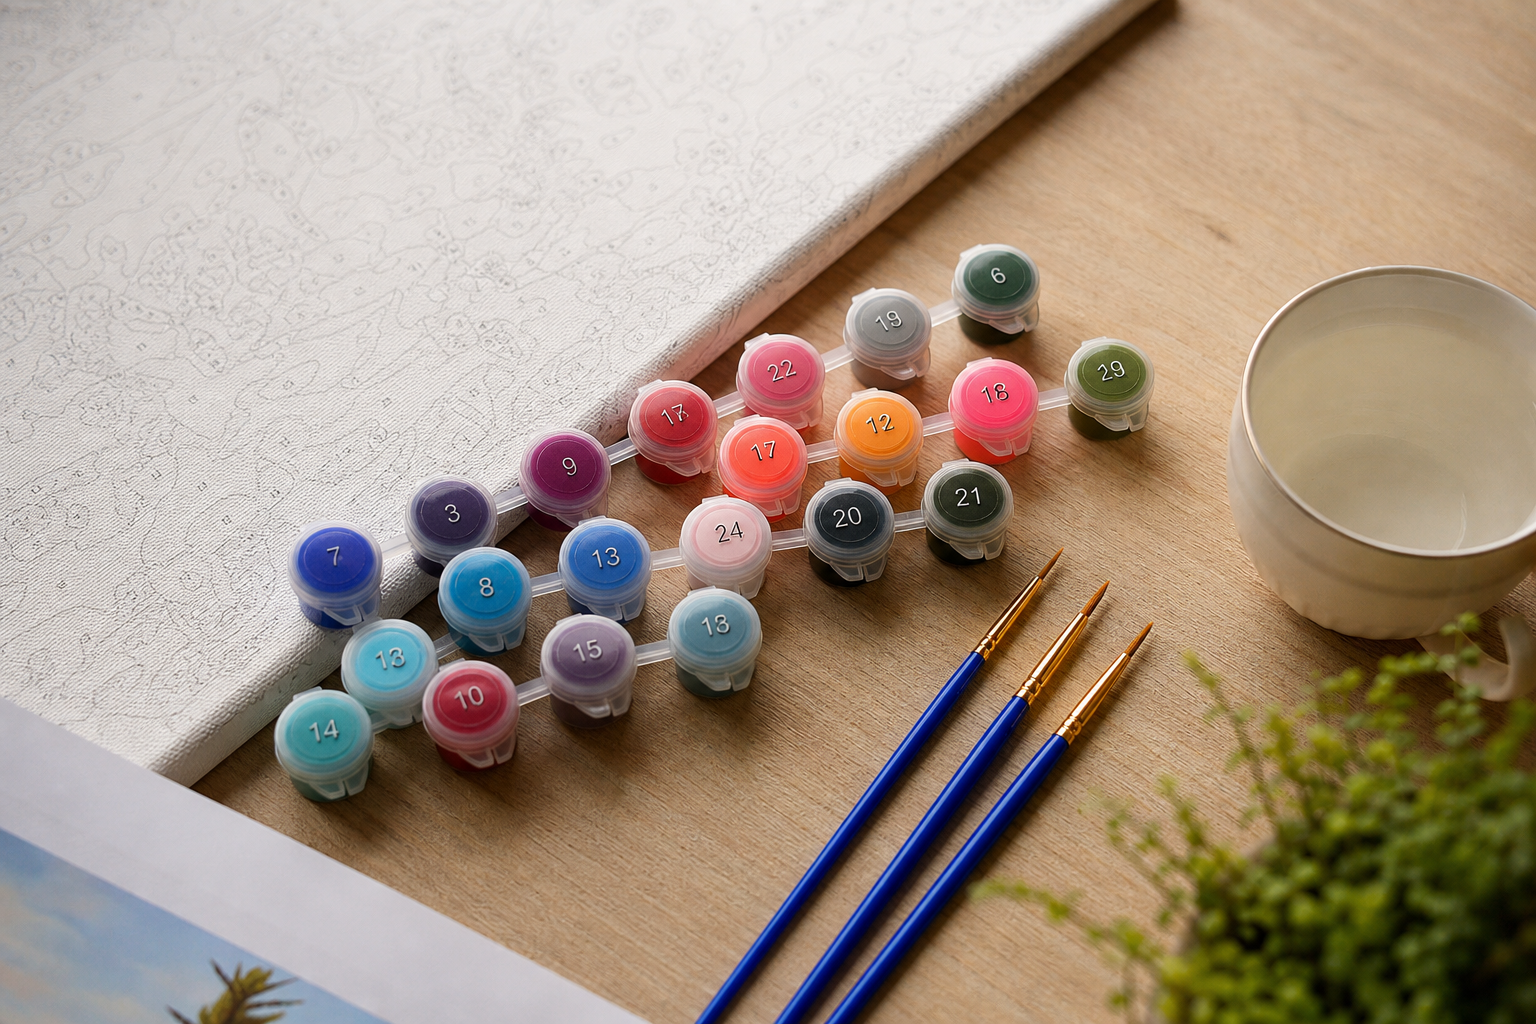
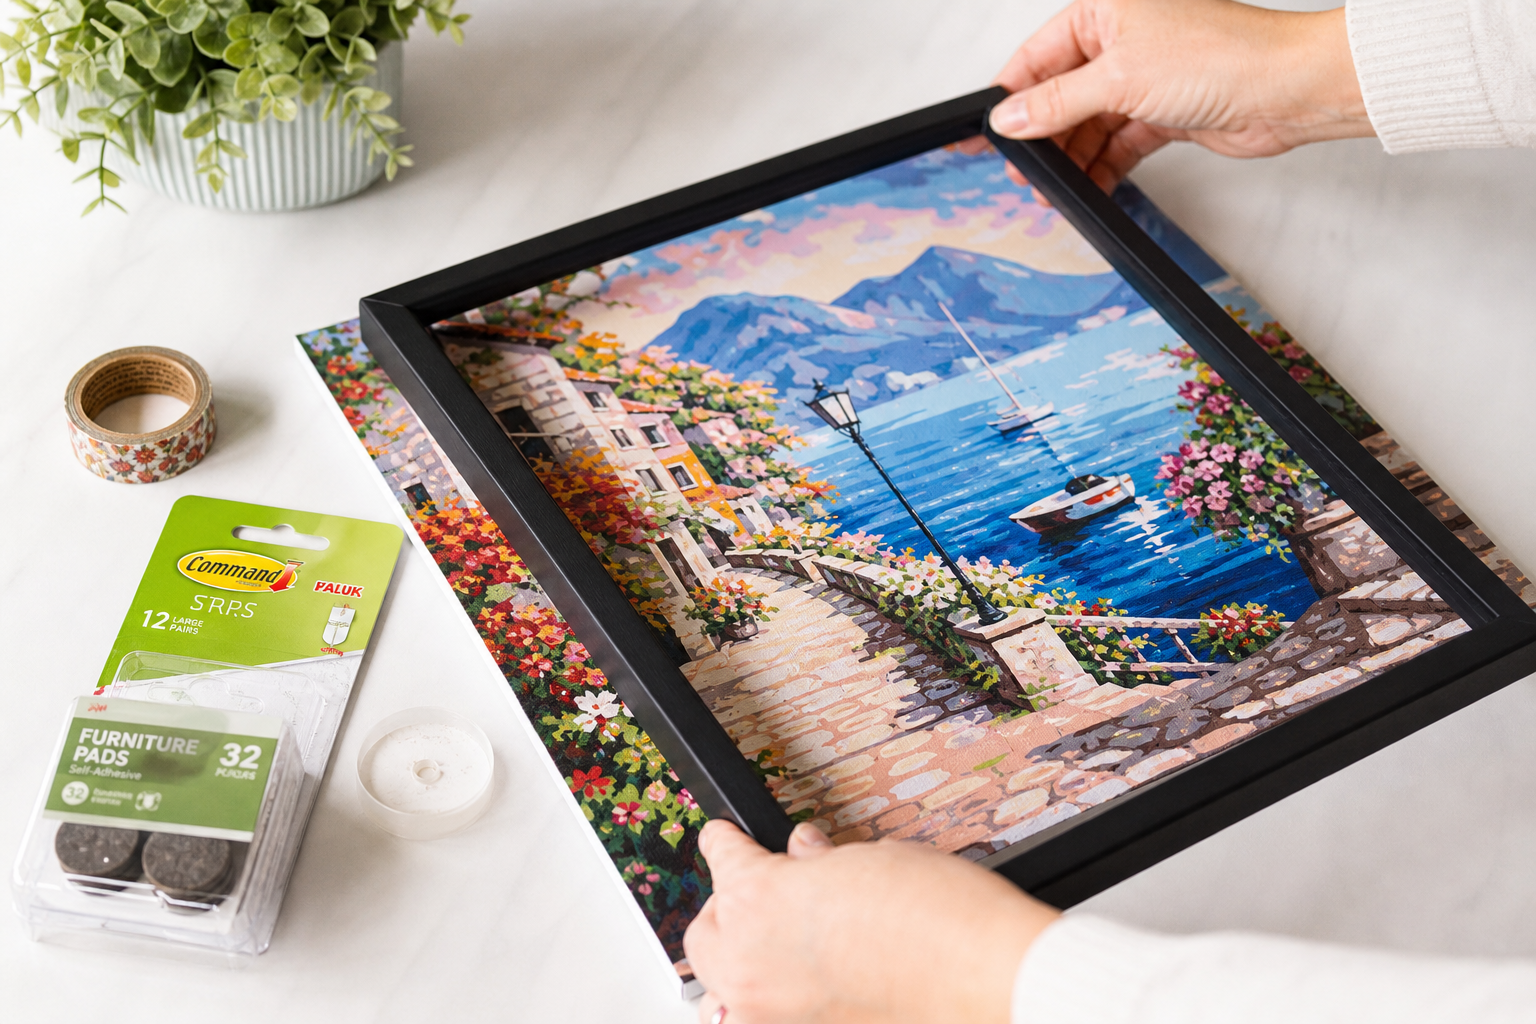
Dollar Store Supplies That Elevate Your Paint by Numbers Project
Your local dollar store is honestly a goldmine for paint by numbers accessories. A quick trip can set you up with everything you need to take your project from “nice hobby” to “wow, did you really paint that?”
Here are some must-grab dollar store finds that make a real difference:
- Picture frames to display your finished canvas like proper wall art. A simple frame instantly adds a polished, gallery-worthy look that makes people take notice.
- Foam brushes for filling in those larger background sections quickly and smoothly, saving your detail brushes for the tricky parts.
- Small plastic containers to hold your rinse water, so you’re not running back and forth to the sink every five minutes.
- Felt pads for the back of your framed piece, protecting your walls from scratches when you hang it up.
- Craft mats or plastic tablecloths to shield your work surface from inevitable paint drips and spills.
For displaying your finished masterpiece, look for LED strip lights and adhesive mounting strips in the crafting aisle. Stick a strip light behind your framed canvas for a soft backlit glow that turns any wall into a mini art exhibition.
The best part? You can pick up all of these supplies in a single shopping trip. No hunting through specialty stores, no waiting for online orders. Just grab what you need and get painting the same day.
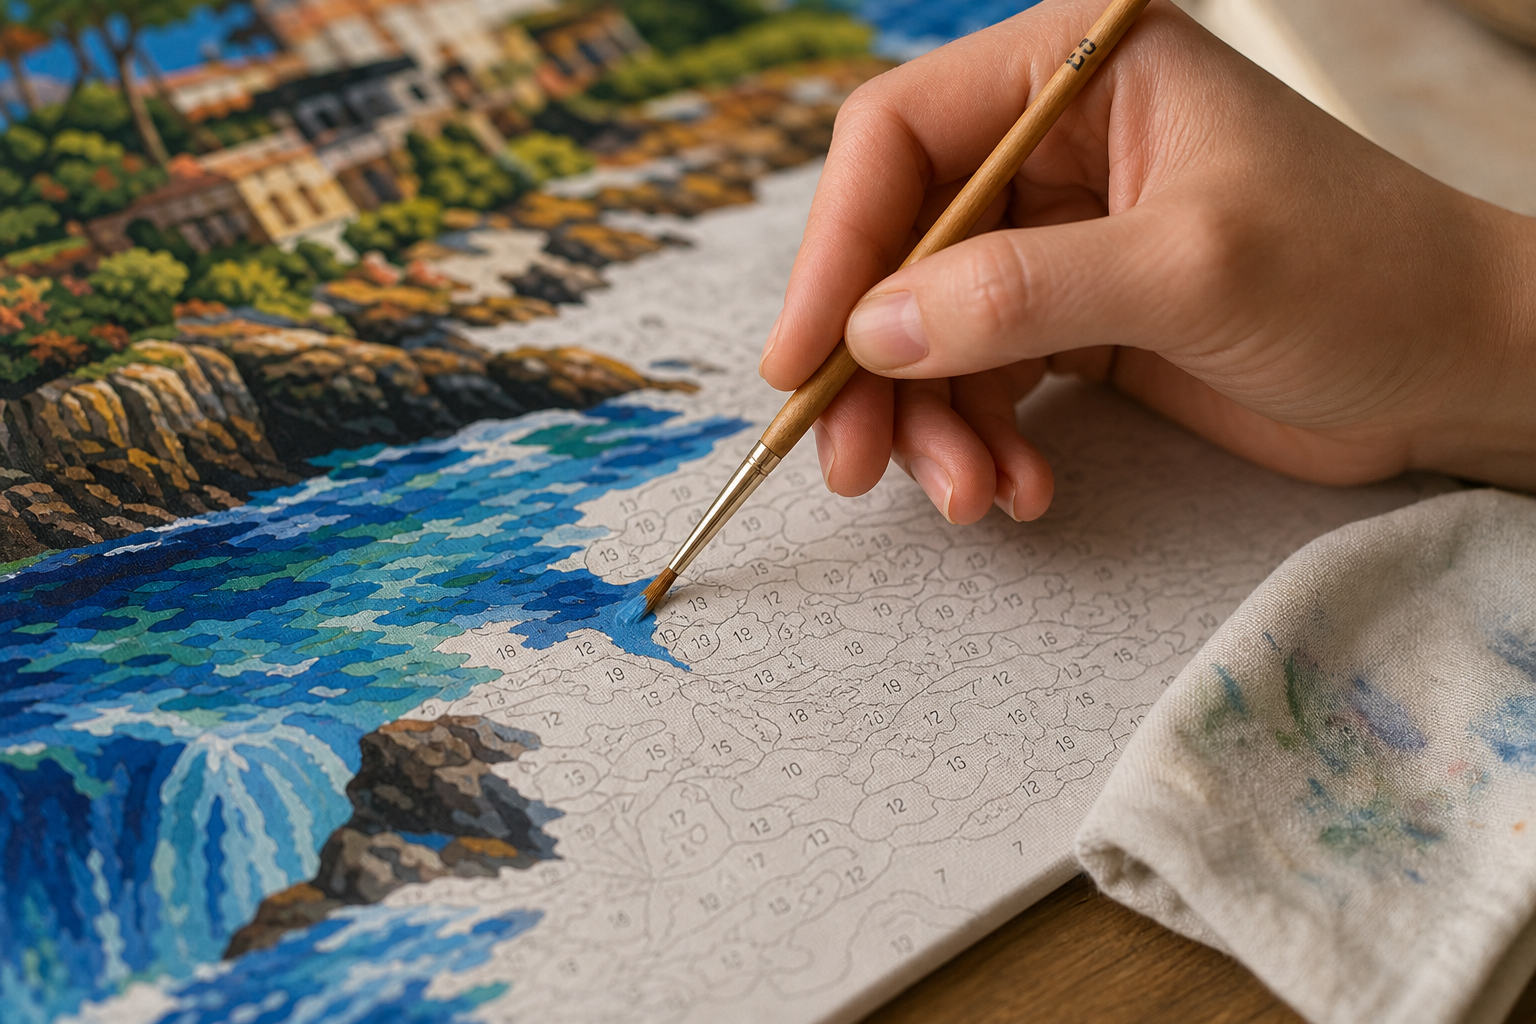
Painting Tips for a Flawless Finish Every Time
Getting a smooth, satisfying result comes down to a few simple habits that most beginners overlook. Let’s walk through a workflow that keeps things stress-free from start to finish.
Start with your darker colors first. They’re more forgiving if you accidentally overlap into a lighter section, since you can easily cover dark-to-light later. Work from the top of the canvas downward to avoid dragging your hand through wet paint. And always let one section dry fully before tackling the area right next to it, or you’ll end up with blurred edges.
Here’s a confidence booster: begin with the largest numbered sections on the canvas. Covering big areas early gives you visible progress fast, and it helps you settle into a rhythm before you tackle finer details.
A few practical tips that make a real difference:
- Set up proper lighting. A simple desk lamp angled over your workspace helps you read small numbers and see true paint colors. Natural daylight near a window works even better.
- Clean your canvas as you go. If you notice paint pulling away from certain sections or not sticking evenly, lightly dampen a clean cloth and wipe the surface before painting. This removes dust and sizing residue that builds up, especially on areas you haven’t touched in a few sessions.
- Fix color mistakes with patience, not force. When a small area looks slightly off after drying, resist the urge to scrape it away. Instead, wait until it’s fully dry, then apply a thin second coat. Wet-on-wet corrections tend to muddy things, but a dry-layer fix blends cleanly and keeps those crisp number boundaries intact.
It’s also worth noting that kits designed by real artists tend to produce smoother color transitions and more cohesive palettes. Brands like Davincified cooperate with real artists to create original designs, so the finished piece carries the authenticity of genuine artwork rather than a mass-produced print. That refinement in the color mapping genuinely makes the painting process easier and the final result more impressive, even for total beginners.